There’s nothing quite as indulgent as a molten chocolate cake. With its gooey center and rich, chocolatey flavor, this dessert is a timeless classic that never fails to impress. Whether you’re serving it at a dinner party or enjoying it as a treat for yourself, this cake is sure to delight. Based on the original recipe by Food & Wine, here is your step-by-step guide to making the perfect molten chocolate cake.
Ingredients:
To make four individual cakes, you will need:
- 4 ounces bittersweet chocolate (preferably 70% cacao)
- 1 stick (8 tablespoons) unsalted butter
- 2 whole large eggs
- 2 large egg yolks
- 1/4 cup granulated sugar
- Pinch of salt
- 2 tablespoons all-purpose flour
- Butter and cocoa powder for prepping the ramekins
Tools Needed:
- 4 ramekins (6-ounce capacity each)
- Baking sheet
- Mixing bowls
- Whisk or hand mixer
- Double boiler or microwave-safe bowl for melting chocolate
Step-by-Step Instructions:
Step 1: Prepare the Ramekins
Preheat your oven to 450°F (230°C). Generously butter the ramekins and dust them with cocoa powder. This will help the cakes release easily after baking. Place the prepared ramekins on a baking sheet and set them aside.
Step 2: Melt the Chocolate and Butter
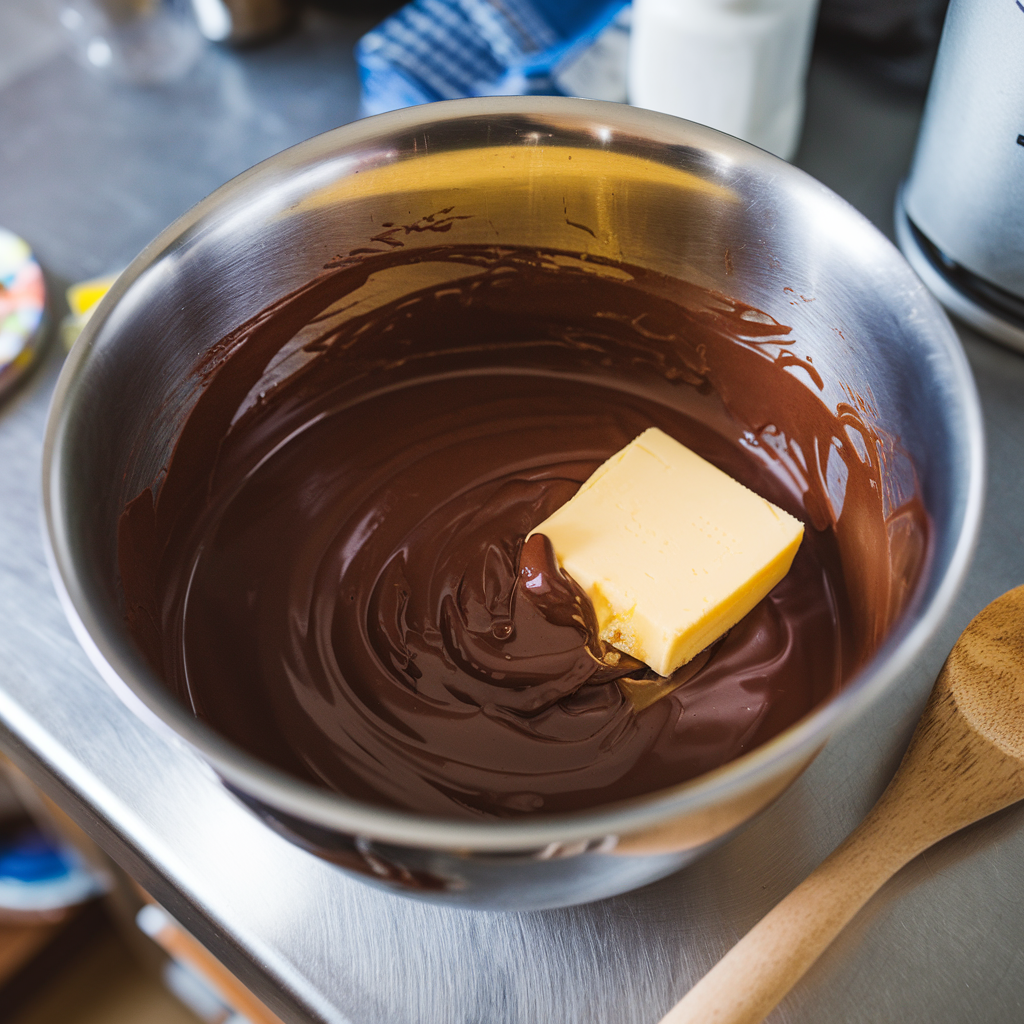
In a double boiler or a microwave-safe bowl, combine the bittersweet chocolate and butter. Melt them together, stirring occasionally until smooth. If using a microwave, heat in 20-second intervals to prevent the chocolate from burning. Once melted, set the mixture aside to cool slightly.
Step 3: Prepare the Egg Mixture
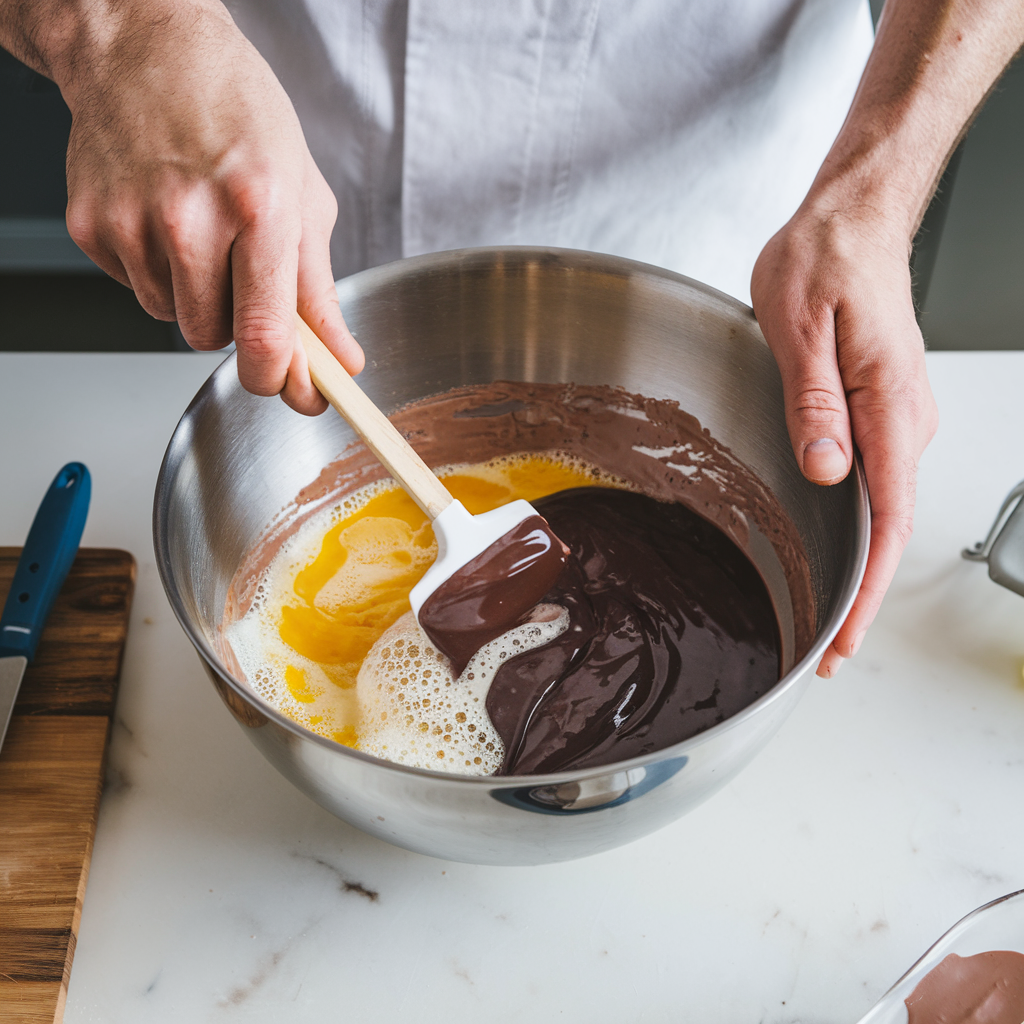
In a medium-sized mixing bowl, combine the whole eggs, egg yolks, granulated sugar, and a pinch of salt. Whisk or beat with a hand mixer until the mixture becomes thick, pale, and slightly fluffy. This step is crucial for achieving the right texture in the final cake.
Step 4: Combine and Fold
Gently fold the slightly cooled chocolate mixture into the egg mixture. Be careful not to deflate the air you’ve incorporated. Sift the flour over the mixture and fold it in until just combined. Avoid overmixing, as this can result in a dense cake.
Step 5: Fill the Ramekins

Divide the batter evenly among the prepared ramekins, filling each about three-quarters full. This ensures the cakes will bake evenly and rise properly.
Step 6: Bake the Cakes
Place the baking sheet with the ramekins into the preheated oven. Bake for 12 minutes, or until the edges of the cakes are firm but the centers are still soft. The tops should have a slight crust, while the centers should remain molten.
Step 7: Serve Immediately
Once baked, remove the ramekins from the oven. Allow the cakes to cool for about 1 minute. Run a knife around the edges of each cake to loosen them, then carefully invert each ramekin onto a serving plate. Tap gently to release the cake.
Step 8: Garnish and Enjoy
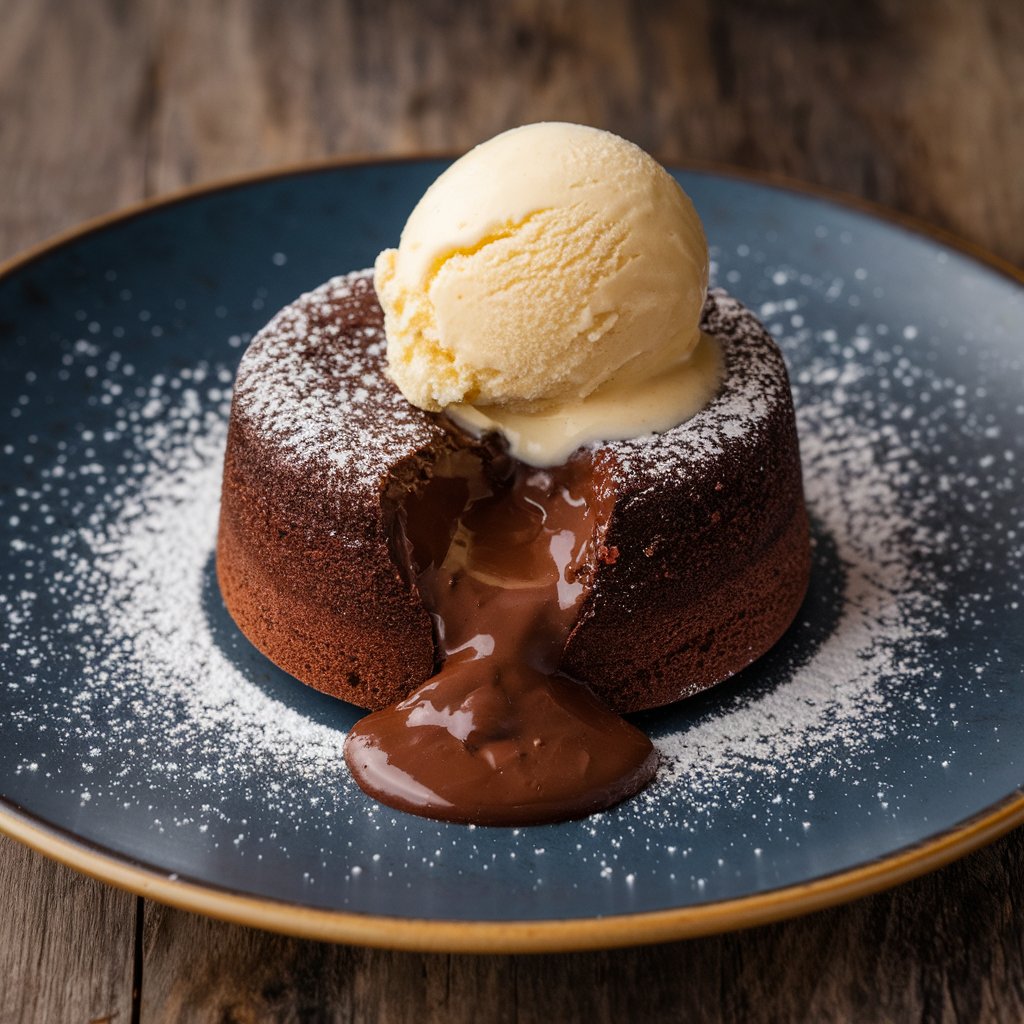
Serve the molten chocolate cakes warm, with a dusting of powdered sugar, a scoop of vanilla ice cream, or fresh berries on the side. The contrast of the warm, gooey center with the cold ice cream is irresistible.
Tips for Success:
- Quality Ingredients Matter: Use high-quality chocolate for the best flavor. The chocolate is the star of this dessert, so opt for a premium brand with a high cacao percentage.
- Timing Is Key: The baking time is crucial to achieving the perfect molten center. Keep an eye on the cakes as they bake, and don’t overcook them.
- Make Ahead: You can prepare the batter in advance and refrigerate it in the ramekins. When ready to bake, let the ramekins sit at room temperature for 15 minutes before putting them in the oven.
- Experiment with Flavors: Add a touch of espresso powder to enhance the chocolate flavor or a dash of liqueur like Grand Marnier for a citrusy twist.
Molten chocolate cakes are a dessert that embodies elegance and comfort all in one. With this recipe, you can recreate the iconic treat in your own kitchen, bringing smiles to your table and satisfying any chocolate cravings. So, roll up your sleeves, gather your ingredients, and get ready to impress with this decadent dessert!
Leave a comment